Products
Solutions
Resources
9977 N 90th Street, Suite 250 Scottsdale, AZ 85258 | 1-800-637-7496
© 2024 InEight, Inc. All Rights Reserved | Privacy Statement | Terms of Service | Cookie Policy | Do not sell/share my information

This practice can be used for both the web and mobile versions of Daily Planning.
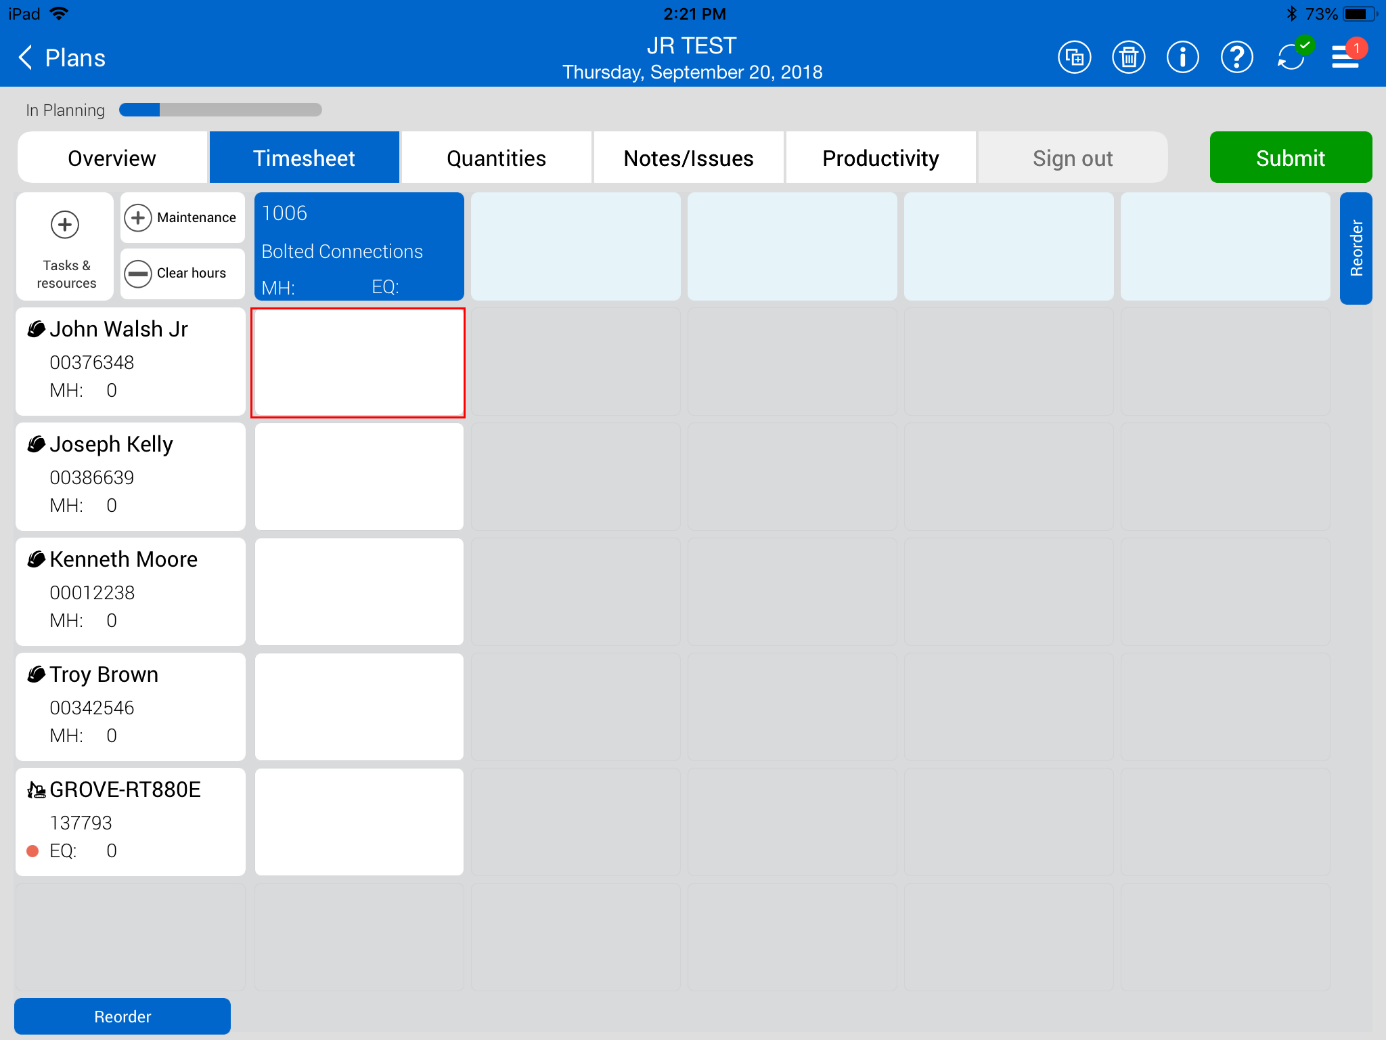
Open the daily plan you are working in and navigate to the Time sheet tab.

Select the tile next to an employee.
Notice that instead of Standard time, Overtime, and Double time, you now have reason codes
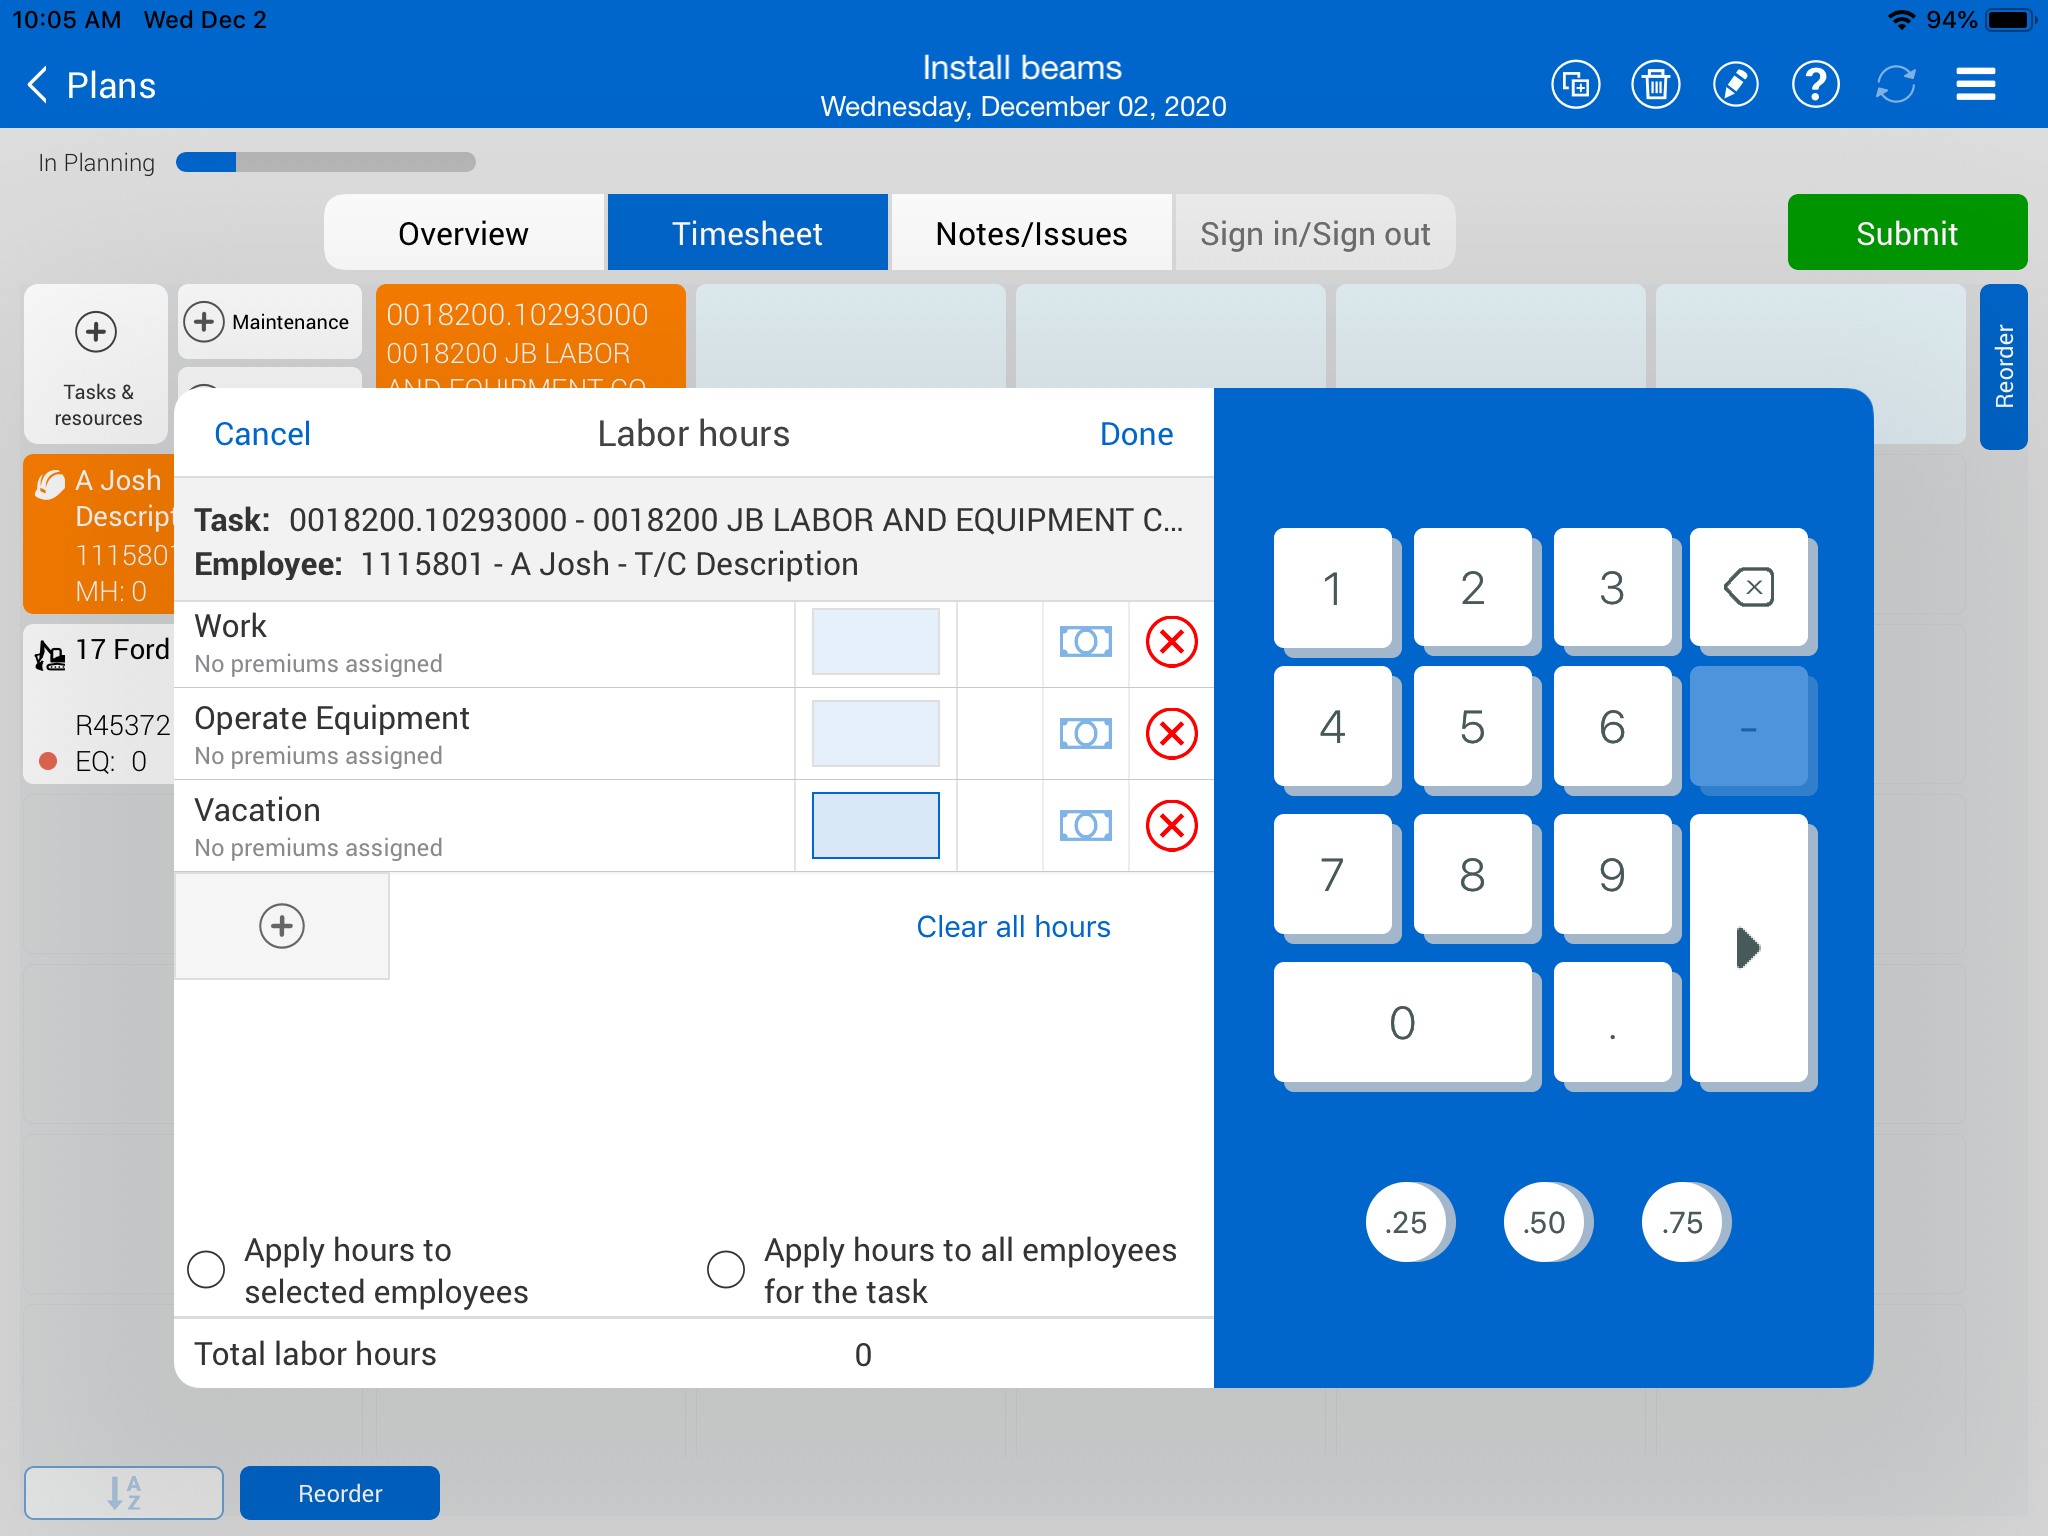
Select the Add icon to see more examples of reason codes.
These categories can be set up in the Organization settings as anything that would be helpful for payroll, such as, Work, time off, Vacation, PTO, etc
In the blank field, enter your employee's hours.
Select the Premium icon to the right of the hours..
Select Done in the Labor Hours dialog box.
Select the white box next to another employee.
Select the Add icon.
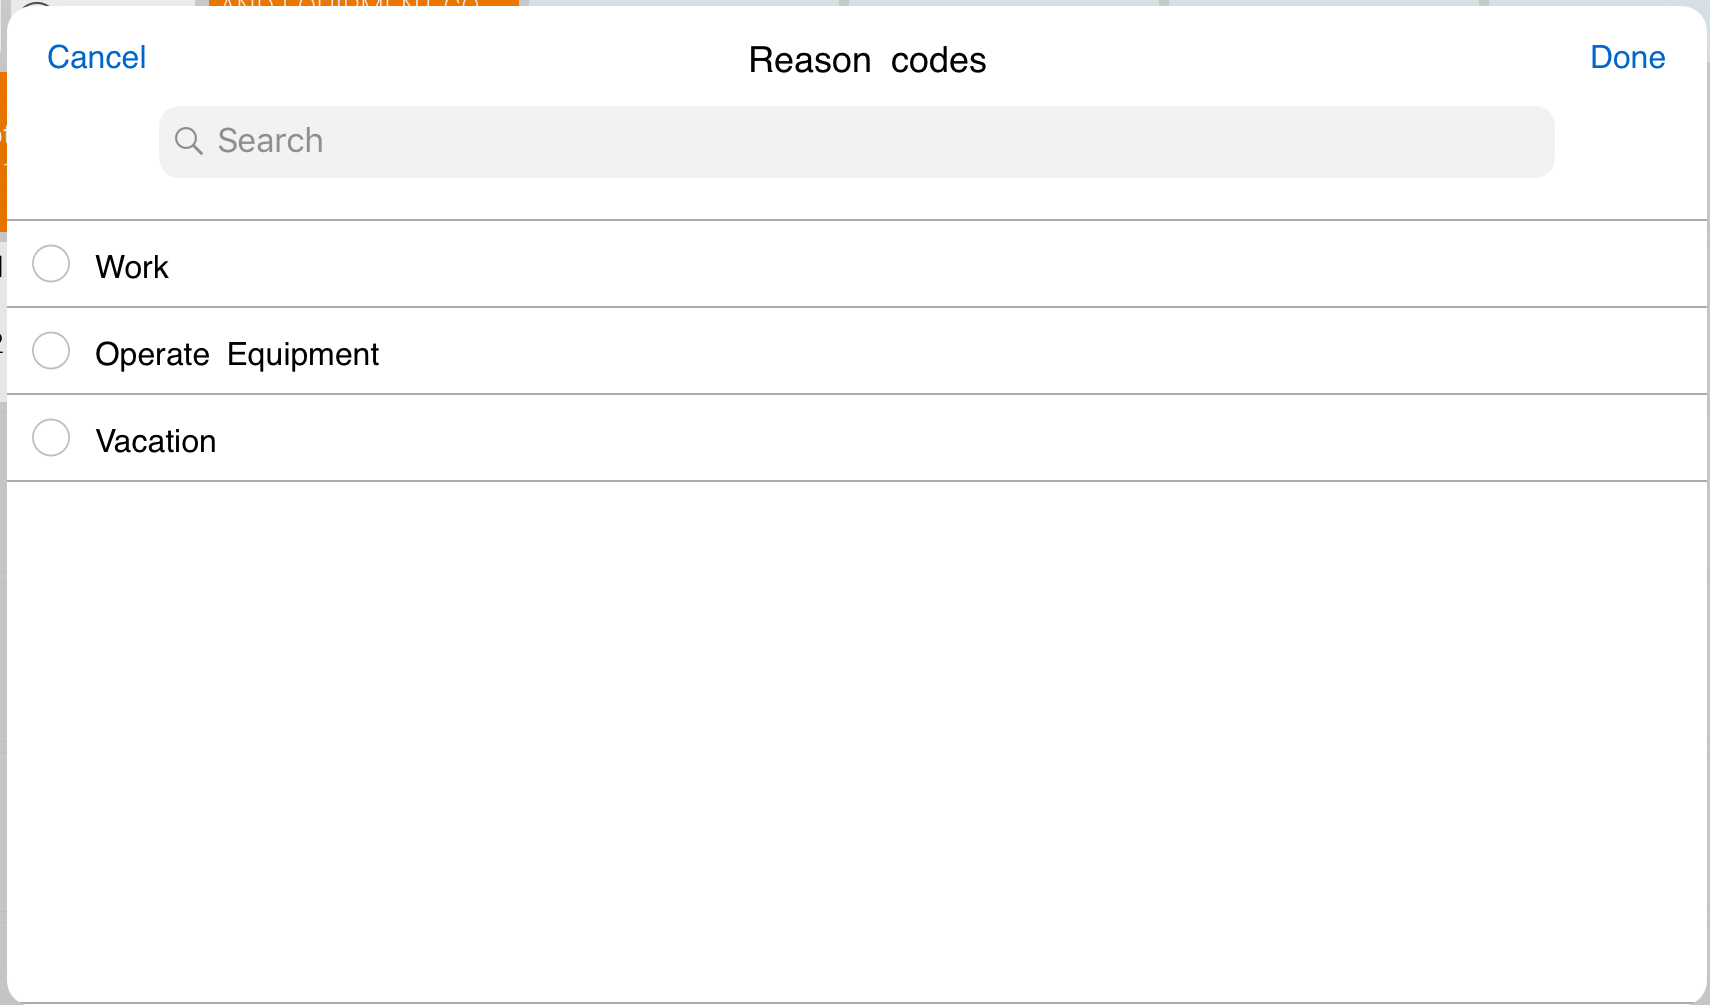
Select a reason code.
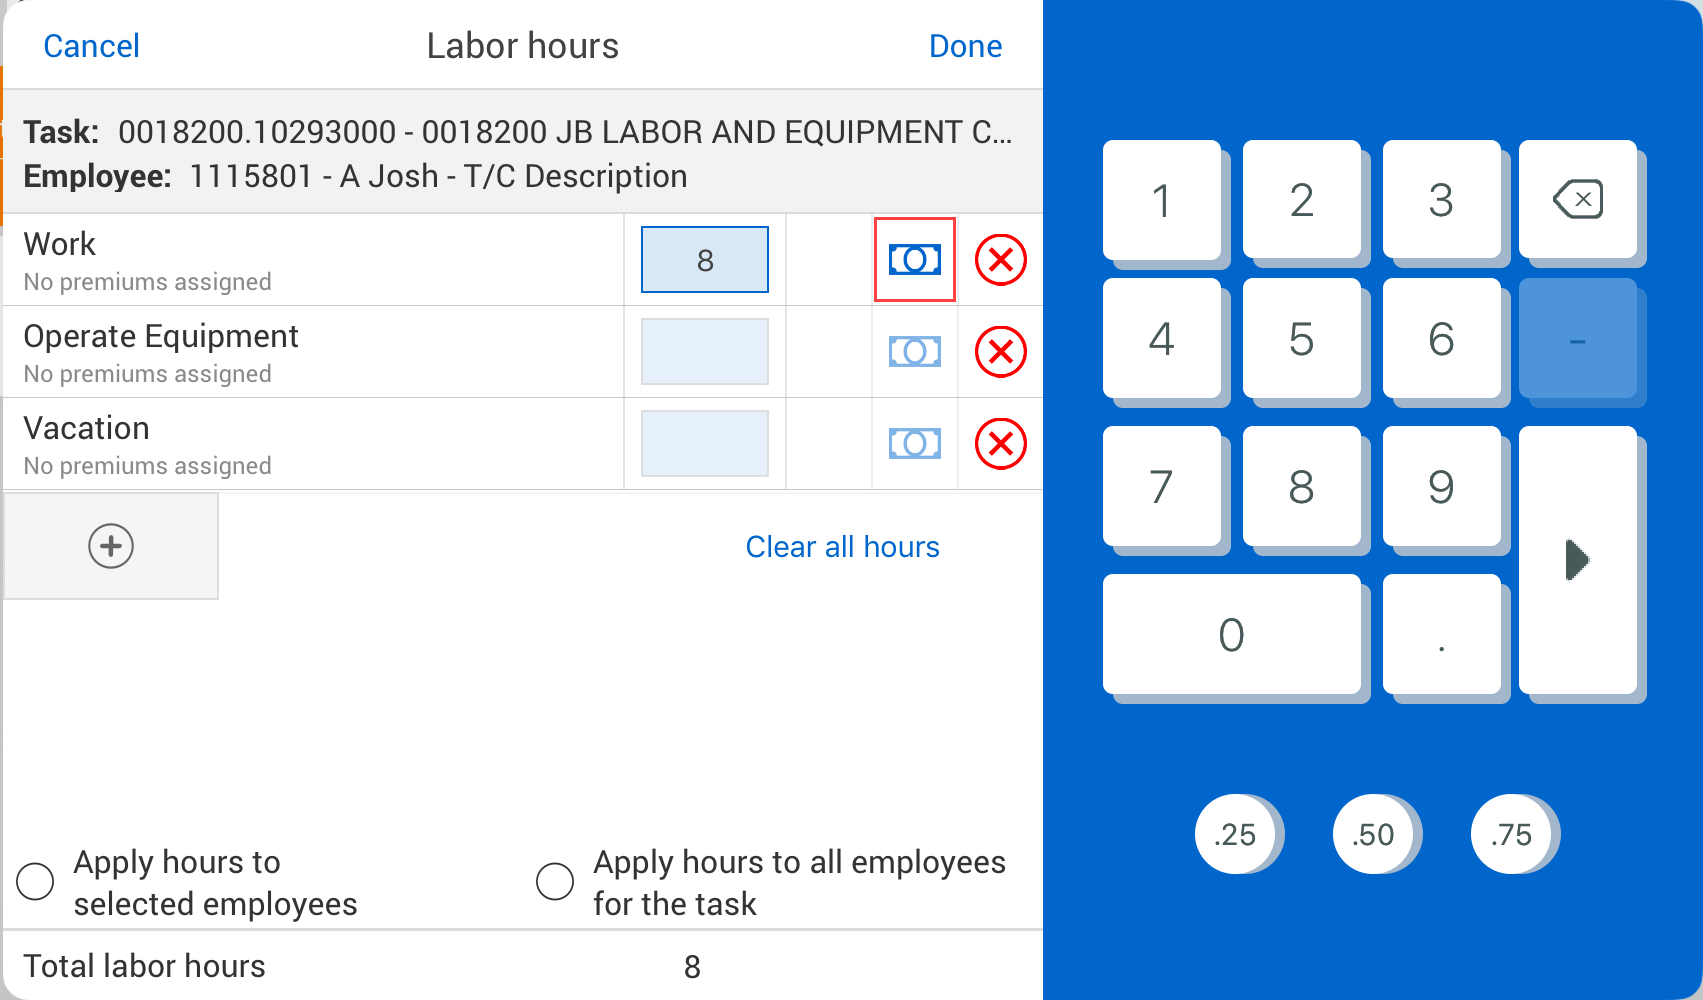
Now the reason code appears as a field to enter hours
Enter your employee's time under the reason code for the employee.
Select Done.
If you change the reason code on an employee that has a premium assigned to it, the premium will be removed, unless the previously assigned premium is valid for the new reason code as well.
Additional Information
9977 N 90th Street, Suite 250 Scottsdale, AZ 85258 | 1-800-637-7496
© 2024 InEight, Inc. All Rights Reserved | Privacy Statement | Terms of Service | Cookie Policy | Do not sell/share my information